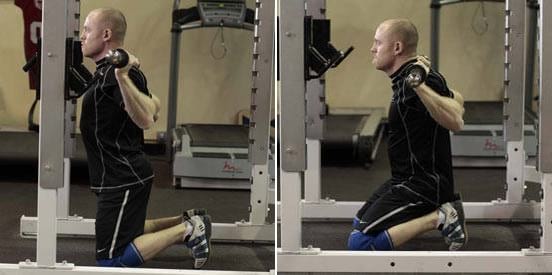
It does not matter if you are digging yourself out of the bottom of a squat or trying to lock out your deadlift you are going to need to have a strong hip extension.
So if you are looking to add some additional Glute training and help perfect your Hip Extension, then you need to start including some Kneeling Squats in your training routine today.
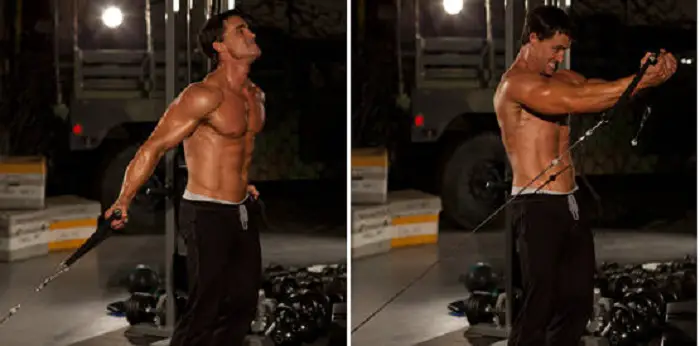
Since this is an isolation exercise, make sure to program it into your routine after all your compound lifts like bench press and the military press.
Before you add this movement into your training program, you should already have a solid foundation of muscle and strength. If you are just starting your fitness journey, your time would be better spent using heavy compound movements instead of isolation exercises like this lift.
Step 1: Set the pulleys to the lowest position. Set the stack to the desired weight you plan to use and grab a pulley handle with each hand.
Step 2: Take a step forward to put tension on the pulley system. Have your Hands below your waist with the palms facing forwards and your arms almost completely straight.
You are now in the starting position for this exercise.
Step 3: Keep a slight bend in your arms and bring your hands upwards and toward the center of your body. Have your palms come together in front of your chest with the palms facing upwards and hold this position while squeezing your chest.
Step 4: Slowly lower your arms back to the starting position
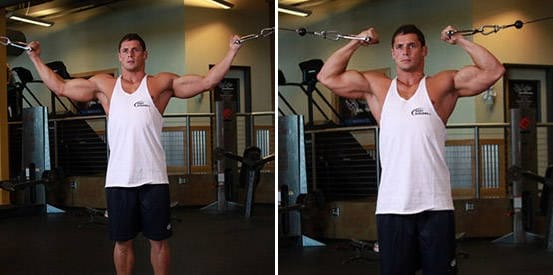
Step 1: Stand in the middle of two high pulleys with your arms stretched out(your arms should be parallel with the floor). Grab each handle with an underhand grip(your palms facing up).
You are now in the starting position.
Step 2: Bend your elbows curling the handles towards you until they are next to your ears, hold this position for one to two seconds. Focus on flexing your biceps as you pull the handles towards your body. Keep your upper arms stationary and only allow your forearms to move.
Step 3: Slowly lower your hands moving only your forearms back to the starting position.
You have now completed one repetition. Repeat for the selected number you have chosen.
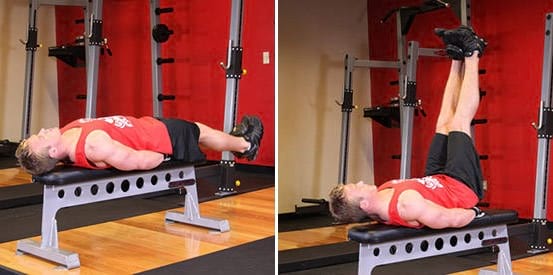
This article will cover how you perform the Flat Bench Lying Leg Raise exercise.
We will include video, image and a written step by step description on how to do this exercise.
Its difficulty level, the equipment you need to do it. The different muscle groups that get worked when you perform it.
The benefits you get when adding it to your training routine. Also, some different training cues to use when you are performing it.
Step 1: Lie down on a weighted bench with your back flat on the bench and your legs extended in front of you off of the end.
Step 2: There are two different possible positions for your hands. 1) You can put your palms down under your glutes or 2) have your hands at the sides holding on to the bench.
You are now in the starting position.
Step 3: Keep your legs extended and as straight as possible exhale and raise your feet until your legs form a 90-degree angle with the floor. When your legs reach 90 degrees, squeeze your core and hold this position for one to two seconds.
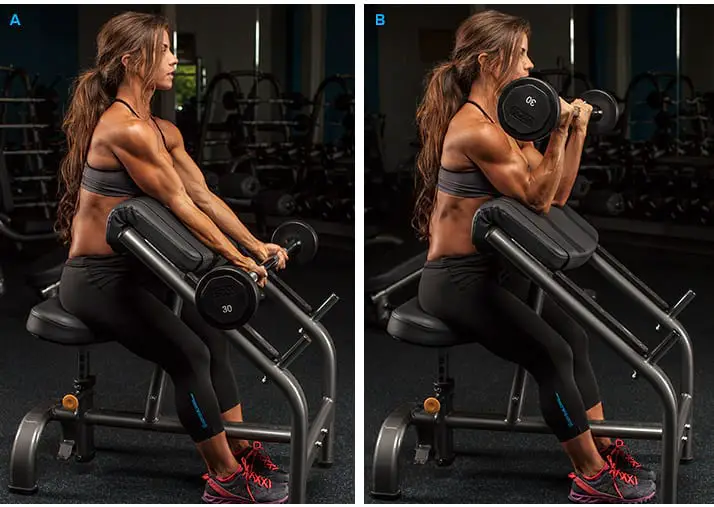
This article will cover how you perform the Barbell Preacher Curl exercise. This lift gets classified as an isolation(single joint movement) strength training exercise.
This article will include video, image and a written step by step description on how to do this exercise.
Its difficulty level, the equipment you need to do it. The different muscle groups that get worked when you use this exercise.
The benefits you get when adding it to your training routine. Also, some different training cues to use when you are performing it.
Before adding this movement to your training, you should build up your strength with heavy compound movements like rowing, pull-up, and chin-ups.
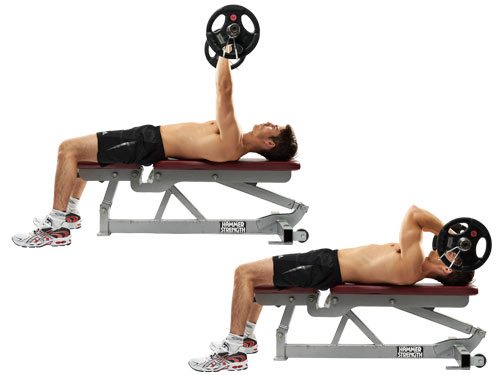
Step 1: Grab a barbell using an overhand grip(pronated) with your arms approximately shoulder-width apart. Lie with your back on a flat bench with your head near the end of the bench.
Step 2: Bring the bar back in a semi-circular motion as you extend your arms bringing the bar to the overhead position. Your arms should be over your head and perpendicular to the floor with your elbows tucked in towards your body.
You are now in the starting position.
Step 3: Inhale and lower the bar by bending at your elbows while keeping your upper arms stationary. Continue lowering the bar until your forearms are perpendicular to the floor.
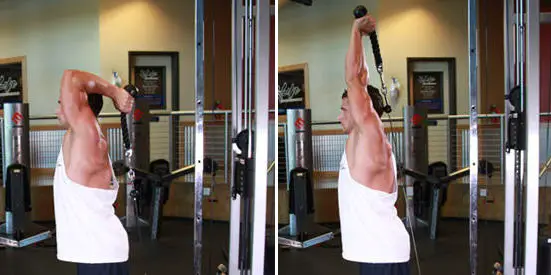
Today's article will cover everything you need to know for adding the Tricep Cable Extension exercise into your training routine.
This article will include video, image and a written step by step description on how to do this exercise.
Its difficulty level, the equipment you need to do it. The different muscle groups that get worked when you use this exercise.
The benefits you get when adding it to your training routine. Also, some different training cues to use when you are performing it.
Since this is an isolation exercise, you will not need to add it to your training routine until you have spent several months lifting and building a foundation of strength and muscle with compound movements (multi-joint movements) Bench Press, Overhead Press, etc.
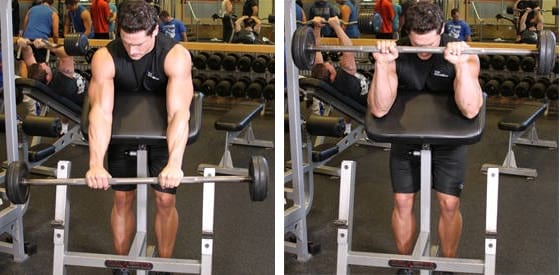
This article will cover how you perform the Reverse Preacher Curl exercise.
This article will include video, image and a written step by step description on how to do this exercise.
Its difficulty level, the equipment you need to do it. The different muscle groups that get worked when you use this exercise.
The benefits you get when adding it to your training routine. Also, some different training cues to use when you are performing it.
Step 1: Grab an EZ-bar using an overhand grip with your hands approximately shoulder width apart.
Step 2: Put the upper part of both your arms onto the top of the preacher bench with your arms extended.
You are now in the starting position.
Step 3: Exhale and curl the bar up until your biceps are in an entirely contracted position with the bar approximately shoulder height. Pause and squeeze your biceps tight for one to two seconds with the bar at the shoulder height position.
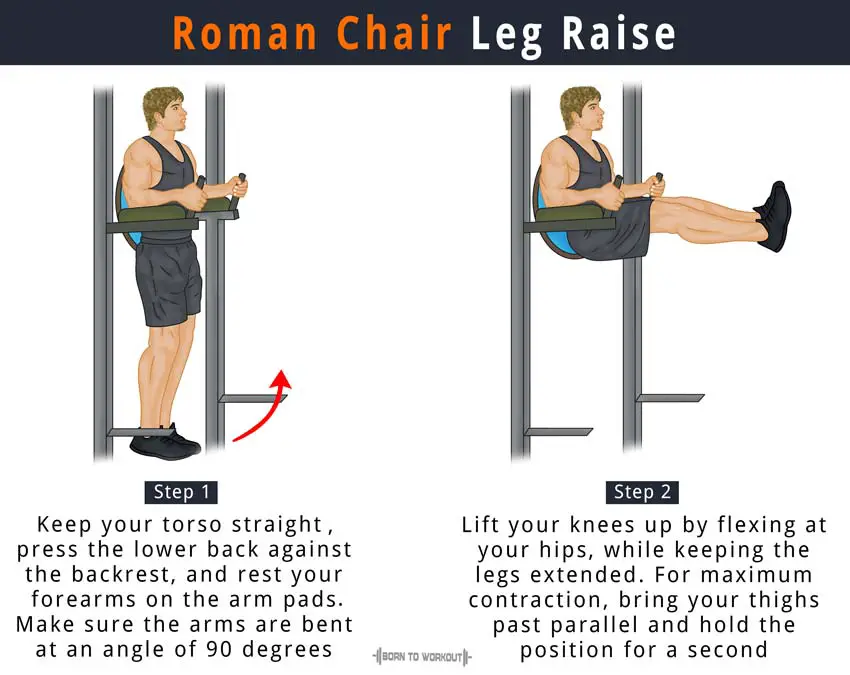
Step 1: Move into a roman chair in the upright position. Place your elbows directly under your shoulders on the cushioned pads and grab the handles with the palms of your hands. Keep your back upright and have it flush against the back of the chair.
You are now in the starting position.
Step 2: Use a slow controlled movement and raise your legs up until they are parallel with the ground. Pause at the top position for one to three seconds. You need to keep your legs as straight as possible.
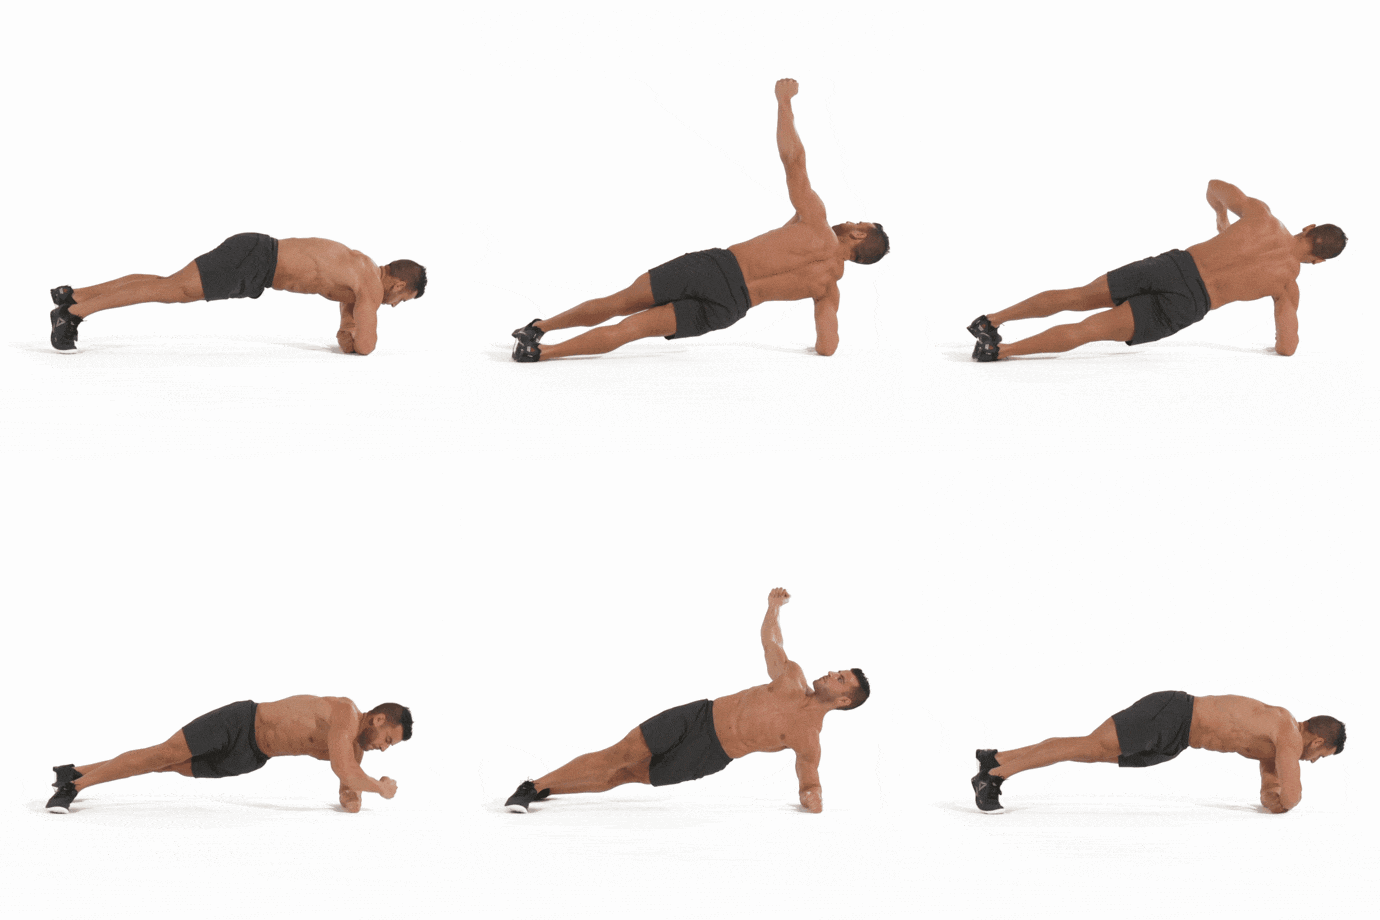
Step 1: Lie down on the floor resting on your right side with your legs fully extended and feet stacked on top of one another. Put your right forearm and elbow on the ground. Your elbow should get placed directly under your shoulder to provide maximum stability.
Step 2: Prop your body up using your right elbow and forearm raising your hips up off of the floor. Have your body form a straight line from your shoulders to ankles.
Step 3: Now, roll your body inward, so you are facing the floor moving to the Front Plank position. As you roll inward, place your left arms elbow and forearm on to the floor to support your body's weight. Your body needs to stay straight when you perform this transition Hold this position for one to three seconds.
Looking to gain more strength or lose some weight? We offer free fitness tools to help you reach your fitness goals. Register for free while we are in beta and get free lifetime access to our fitness tools that include an easy to use Calorie Counter, High-Intensity Interval Timer, Multiple Fitness Calculators and our Exercise Logger.